How to Install NavySeal Just Click It Kodi: Alright, let’s get this set up without turning it into rocket science—this guide walks through how to download and install the Navyseal Just Click It addon (you might remember it as NavySeal Platinum K19) on Kodi, step by step, minus the tech-snob energy. It works smoothly on Kodi 21 Omega, Kodi 20 Nexus, and Kodi 19 Matrix, so no matter which version is running, you’re covered. The process To install Navyseal Platinum Kodi Addon is basically the same across devices too—whether it’s an NVIDIA SHIELD, a Windows laptop, macOS setup, Amazon Fire TV stick, Android TV box, or even a phone or tablet. Nothing fancy, no secret handshake required—just a clear path from start to finish so you can get it running and move on with your day.
What Is the Navyseal Kodi Addon?
Navyseal Just Click It—previously called Platinum K19—is a third-party Kodi addon tucked inside The South Paw Repository, and it’s basically built for people who just want to press play and not overthink it. It pulls in everything from cozy 90s throwbacks to newer action-heavy stuff, which feels oddly satisfying when the mood swings from nostalgia to explosions in one evening.
It’s clearly designed with Real-Debrid and similar premium debrid services in mind, so yeah, a paid account makes things run way smoother—no sugarcoating that—but there’s also a free one-click section that serves up a decent mix of movies, shows, and even documentaries without asking for a subscription.
The layout is clean, not cluttered with chaos, and actually makes browsing feel simple instead of like digging through digital junk drawers. For a third-party addon, it’s surprisingly polished, and honestly, that balance of function and no-nonsense design is what makes it stand out on Kodi right now.
How to Install Doomzday Kodi Builds
Is the Navyseal Kodi Addon Safe & Legal?
From a safety angle, Navyseal Just Click It doesn’t throw off any obvious “run for the hills” vibes—it didn’t ask for weird permissions, didn’t poke around in sensitive files, and the settings menu is refreshingly normal, not some shady maze of toggles. There’s also been zero panic in the usual Kodi circles about malware, which says something.
Just to be extra cautious (call it nerd paranoia), the source URL for The South Paw Repository was scanned through VirusTotal, and it came back clean—no nasty surprises hiding under the hood. Legality, though, is where things get a little murky. Installing the addon?
Fine. What it streams? That depends. Since it pulls links from all over the internet, and some of those could host copyrighted content without proper licensing, streaming certain titles might cross legal lines depending on where you live.
And realistically, nobody’s auditing every single link in a third-party addon. So yeah, common sense matters here—know the risks, stay aware, and if unofficial addons are in the mix, using a solid VPN isn’t paranoia, it’s just smart digital self-defense.
How to Install Navyseal Platinum K19 Kodi Addon 2026
Let’s walk through the steps to install the Navyseal Just Click It (formerly Platinum K19) addon on Kodi.
To make things simple, I’ve broken the process down into three parts:
- Part 1: Adjust a Kodi setting to allow third-party installations
- Part 2: Install The South Paw Repository
- Part 3: Use the repository to install the Navyseal Just Click It addon
Follow along, and you’ll have the addon up and running in no time.
Part 1: Enable Unknown Sources on Kodi
To install Navyseal Just Click It (or any third-party Kodi addon), you need to enable unknown sources. Here’s how to do it:
- From the Kodi home screen, head up to that little gear icon chilling in the top-left corner—it’s the gateway to everything slightly “advanced,” even if it looks harmless.
- Once inside, choose System (bottom right). It’s not as intimidating as it sounds, promise.
- On the next screen, scroll down the left sidebar and click Add-ons. This is where Kodi starts loosening its tie.
- On the right side, find Unknown sources and flip that switch ON. Yes, this is the part that feels mildly rebellious.
- A warning box will pop up doing its dramatic “Are you sure?” routine. Take a breath, click Yes, and move on. It’s just Kodi making sure you mean it.
Part 2: Install The South Paw Repository
Now that Kodi is set to allow third-party installations, let’s add The South Paw Repository, which contains the Navyseal Just Click It addon.
- Hit the back button and head to the main Settings screen again—yeah, a little back-and-forth is part of the Kodi life.
- Open File manager. This is where things start to feel slightly techy, but stay with it.
- Scroll down and click Add source. Nothing fancy yet.
- When the popup shows up, tap on <None>—it looks suspiciously empty, but that’s exactly where the magic goes.
- Type in the repository URL carefully (double-check it; one typo and Kodi acts clueless). Then hit OK.
- Click the box under “Enter a name for this media source,” type something simple like Southpaw—keep it short so future-you doesn’t get confused—and press OK.
- Click OK one more time to lock it in. Yes, Kodi loves confirmation buttons.
- Back to the Settings menu again, then into Add-ons—almost there.
- Choose Install from zip file. This is the part that feels mildly hacker-ish, even though it’s totally routine.
- On Kodi 19, a warning pops up acting dramatic—just click Yes and move along.
- From the list, select Southpaw (or whatever name was given earlier—no judgment if it was something random).
- Click the zip file you see to start installing the repository.
- Wait a few seconds, and watch the top-right corner for that satisfying little notification: “South Paw Repository Add-on installed.” That tiny message? Weirdly rewarding.
Tips For Installing Navyseal Just Click It Addon
With the repository installed, it’s time to install the Navyseal Just Click It Kodi addon:
- From the same screen, select Install from repository.
- Choose The South Paw Repository.
- Scroll down and select Video add-ons.
- From the list of available addons, click Navyseal Just Click It.
- Click the Install button in the bottom-right corner.
- A prompt will appear asking to install additional dependencies—click OK.
- After a moment, you’ll see a notification confirming Navyseal Just Click It Add-on installed.
You’re all set! You can now access Navyseal Just Click It from the Add-ons > Video add-ons section of your Kodi home screen.
How to Stream on FireStick with a VPN
Before you start streaming In Firestick, I would like to warn you that everything you stream on firestick is visible to your ISP and Government. This means, streaming copyrighted content (free movies, TV shows, live TV, and Sports) might get you into legal trouble.
Thankfully, there is a foolproof way to keep all your streaming activities hidden from your ISP and the Government. All you need is a good VPN for FireStick Streaming. A VPN will mask your original IP which is detecting… and will help you bypass Online Surveillance, ISP throttling, and content geo-restrictions.
I personally use and recommend ExpressVPN, which is the fastest and most secure VPN. It is compatible with all kinds of streaming apps and devices.
NOTE: We do not encourage the violation of copyright laws. But, what if you end up streaming content from an illegitimate source unintentionally? It is not always easy to tell the difference between a legit and illegal source.
So, before you start streaming on FireStick, here's how to get VPN protection in 3 simple steps.
-
Step 1 Get the ExpressVPN subscription
Get it HERE. It comes with a 30-day money-back guarantee. Meaning, you can use it free for the first 30-days and if you are not satisfied, you can ask for a full refund.
-
Step 2 Download and install the ExpressVPN app
Click HERE to download and install the app on your streaming device. If you are using a FireStick, I have given the exact steps starting with Step 4 below.
-
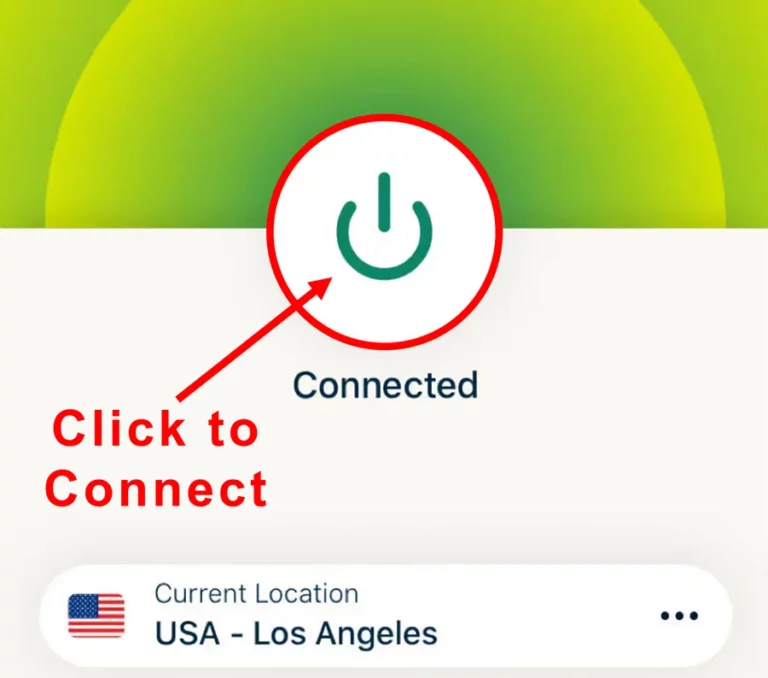
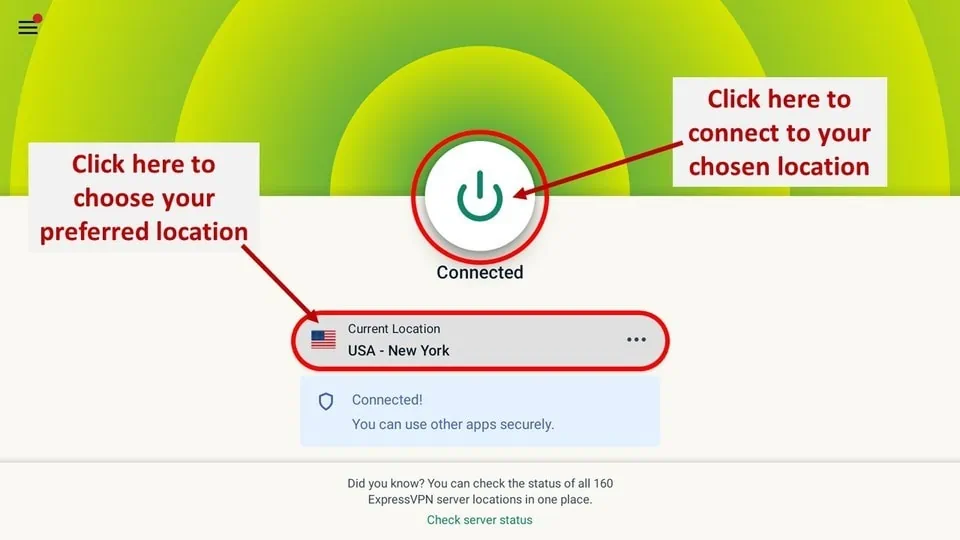
Step 3 Click the Power icon to connect
Your connection is now secure with the fastest and best VPN for FireStick.
The following are the steps to install ExpressVPN VPN on your Fire TV devices. If you have other streaming devices, follow Step 1-3 above.
-
Step 4 Subscribe to ExpressVPN
Subscribe HERE (if not subscribed already).
-
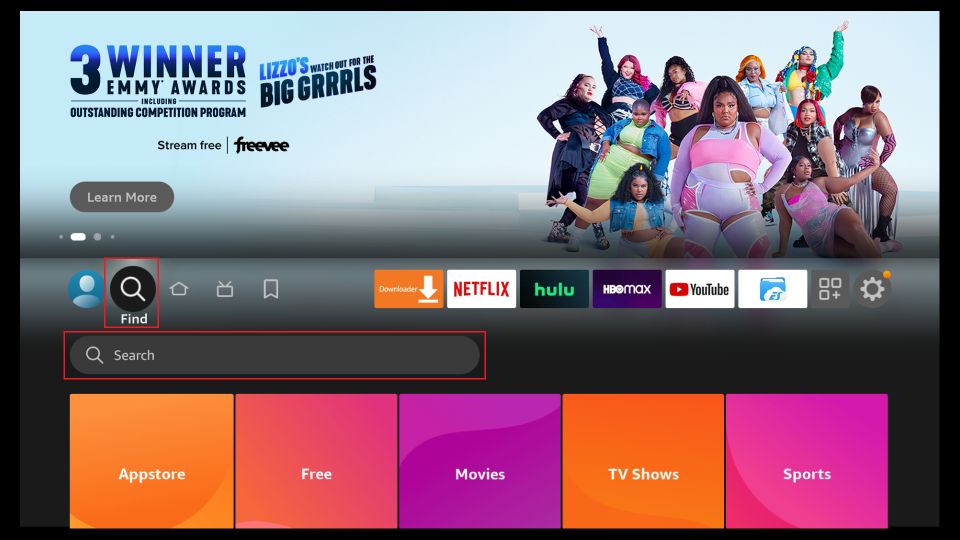
Step 5 Go to Fire TV Stick home screen.
Click Find followed by Search option (see image below).
-
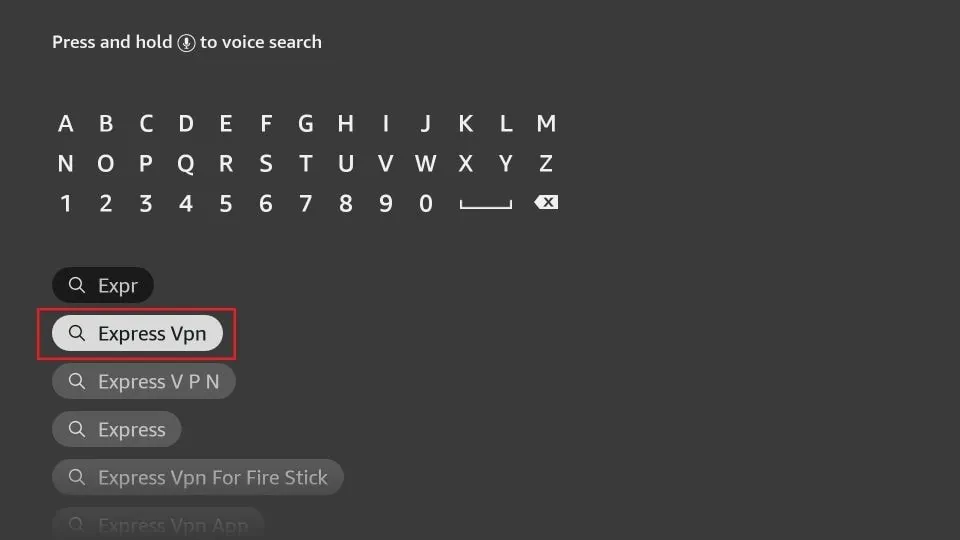
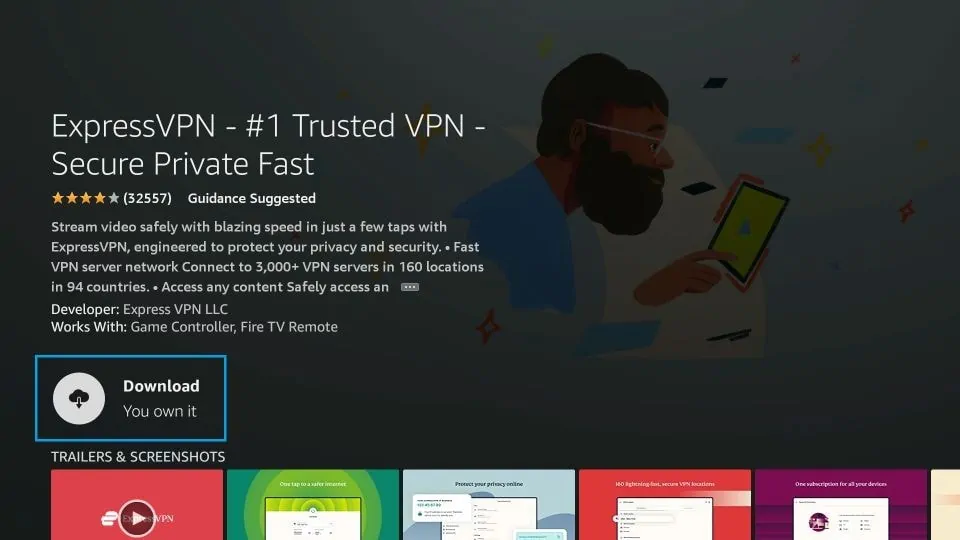
Step 6 Type Expressvpn in the search bar and select when it shows up
-
Step 7 Click Download
-
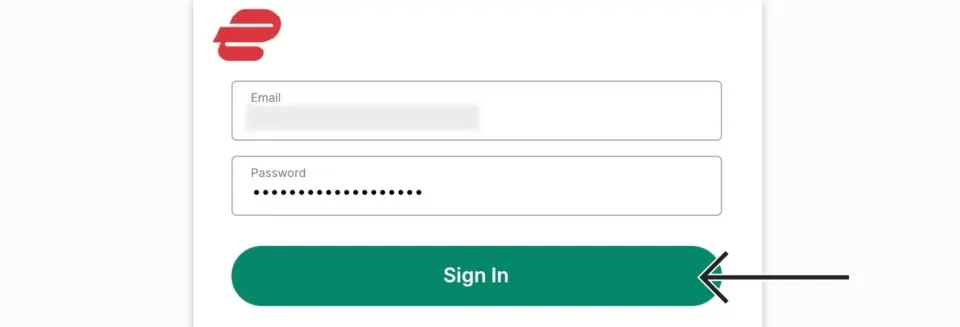
Step 8 Open the ExpressVPN app
Sign in using the email ID and password that you created while buying the ExpressVPN subscription.
-
Step 9 Click the Power icon to connect to a VPN server.
That’s all. Your FireStick is now secured with the fastest VPN.
Navyseal Kodi Devices Support
- Kodi runs on almost everything — Windows, macOS, Linux, Android, iOS, even that dusty Raspberry Pi sitting in a drawer. Odds are, at least one device at home can handle it without breaking a sweat.
- On Windows and macOS, installation feels almost suspiciously simple. Download. Click. Done. The kind of setup that makes people double-check if they missed a step.
- iOS and Raspberry Pi? Different story. Not impossible — just a bit more hands-on, a little nerdy, the kind of weekend project that quietly turns into “well, since we’re here…”
- One of Kodi’s underrated charms is syncing media across devices. With the right add-ons or a local network setup, every room can quietly become its own media haven. Slightly excessive? Maybe. Deeply satisfying? Absolutely.
- Building a dedicated Kodi box for each space isn’t overkill — it’s commitment. Some call it unnecessary. Others call it a beautiful ecosystem.
- Kodi is open-source, powered by the non-profit XBMC Foundation, which means the community shapes it. Real people. Real updates. Frequent improvements. Occasionally messy, often brilliant.
- Updates roll out regularly, and the Official Kodi Blog keeps track of what’s new. Stable releases are the sensible choice for most — dependable, tested, drama-free.
- For the brave and curious, the latest development builds exist. Cutting-edge, slightly risky, full of potential. Perfect for tinkerers who enjoy living on the software edge.
- Kodi isn’t just software; it’s a playground for customization. Sensible users stick with stable builds. The adventurous poke around in nightly versions. Both paths work — just depends on how much chaos feels exciting.
- Easy where it should be, complex where it gets interesting, and always evolving — imperfect, community-driven, and refreshingly human.
How to Use the Navyseal Just Click It / Platinum K19 Kodi Addon
The Navyseal Just Click It addon is packed with a wide variety of content, including movies, TV shows, music, and more—making it a go-to addon for Kodi users.
Launching the Addon
To open the addon from the Kodi home screen:
- Scroll down to the Add-ons section (but don’t select it).
- Move to the right side of the screen and scroll down to the Video add-ons area.
- Locate and click on Navyseal Just Click It to launch the addon.
After a brief loading period, you’ll see the addon’s main interface. Here’s what the menu includes:
- Navyseal Just Click It (Free One-Click Links)
- Movies
- TV Shows
- Trakt
- Last Link Played
- Resume Watching
- My RD History
- RD Torrents
- Search
- Search History
- Settings
Installed NavySeal 2026 Features
Select the Navyseal Just Click It folder at the top of the menu to access the free one-click content. You’ll need a password for this section. To get it, email the address provided in the pop-up message when prompted.
Exploring Movies
Click on the Movies tab to view the available titles. This section pulls in content via Real-Debrid and is organized into folders like:
- Theaters – Current box office hits
- Popular Movies
- 3-D Movies
- Genre
- Years
Navigate to any folder and pick a movie. The addon will begin fetching streaming links automatically.
Watching TV Shows
To explore TV series, go back to the main menu and open the TV Shows folder. Here, shows are sorted into helpful categories such as:
- Popular
- On The Air
- New TV Shows
- New Episodes
- Genre
- Years
Choose a section based on your interest or browse the Popular folder to see trending titles. Select a show, and premium debrid links will be scraped for viewing.
Using the Search Feature
Need something specific? Use the built-in Search function:
- From the main menu, scroll down and click Search.
- Enter a keyword from the title of the movie or show you’re looking for.
- Click OK, and in a few seconds, you’ll see a list of matching results.
Adjusting Addon Settings
To configure the addon to your liking:
-
Scroll to the bottom of the main menu and select Settings.
-
A window will appear with several tabs:
- General – Basic preferences for the addon
- Trakt – Sync your Trakt account
- Debrid – Link services like Real-Debrid
How to Set Up Real-Debrid With Navyseal Platinum K19 2026
Beyond the free one-click section, most of the content inside the Navyseal Just Click It addon relies on a debrid service like Real-Debrid to fetch high-quality links. To unlock the full potential of this addon, you’ll need an active debrid subscription. In this walkthrough, I’ll guide you through integrating Real-Debrid, the most popular debrid service. If you don’t already have an account, visit Real-Debrid’s official website and sign up.
Step-by-Step: Link Real-Debrid with the Addon
- Fire up Kodi and let it load like it always does—calm, simple, slightly nostalgic.
- From the home screen, slide over to Add-ons (yes, that familiar corner where all the fun stuff lives).
- Tap into Video add-ons, find Navyseal Just Click It, and open it up.
- Once you’re inside, scroll down to Settings—it’s not flashy, but it’s where the real magic hides.
- In the settings window, look to the left and click the Debrid tab.
- On the right side, flip the switch for Enable debrid service—give it that satisfying little toggle.
- Hit Re-auth Real-Debrid and wait a second.
- A small pop-up shows up with a code and a URL—this is the part that feels oddly official.
- Grab your phone or laptop, open a browser, and head to the link shown on screen.
- Type in the code from Kodi, press Continue, and follow the prompt.
- It’ll ask for a name for this connection—something simple like “Navyseal Just Click It” works fine. Set the name and confirm it.
- Head back to Kodi, and that’s it—Real-Debrid is linked and ready, like flipping a switch from “meh” to “let’s go.”
Best NavySeal Alternatives 2026 For Streaming
|
Service Name |
Primary Feature / Category |
|
Tubi TV |
Best overall legal free streaming with a massive 275,000+ title library. |
|
Cineby |
Best “unofficial” alternative for high-speed, ad-free HD movie releases. |
|
Pluto TV |
Best for a “cable-like” experience with 24/7 live themed channels. |
|
Plex |
Best for combining free ad-supported content with your own personal media. |
|
DoraWatch |
Best niche alternative for extensive TV series collections and mirrors. |
Final Thoughts For Install NavySeal 2026
And that’s the whole journey—install Navyseal Just Click It on Kodi, connect Real-Debrid, and suddenly streaming feels the way it always should’ve been: smooth, instant, no buffering circle mocking your existence. There’s a weirdly satisfying moment when a link loads without drama—no tweaking, no refreshing, no quiet frustration—just press play and it goes. Premium links if you want the good stuff, free one-click if you’re feeling casual; either way, it does the job without making you babysit it. Sure, addons can get temperamental sometimes (they all have personality, apparently), but when it works, it really works. If anything glitches out, say something and it’ll get figured out. Otherwise, kick back, queue something up, and enjoy streaming that doesn’t feel like a test of patience or character.