Install Doomzday Kodi Builds: Getting Doomzday Kodi Builds onto Kodi 20 is surprisingly painless, and the best part is it works on just about everything—from Fire Sticks and Cubes to Android boxes, phones, laptops, and even a Raspberry Pi if one feels adventurous. Doomzday isn’t just another boring build collection; it’s like a candy store for Kodi nerds.
Whether craving something super lightweight that won’t hog every byte of memory or a decked-out setup with all the bells and whistles, there’s a build for every mood. Each one already comes stuffed with popular addons, so diving into live TV, movies, shows, sports, or that random late-night documentary obsession is practically instant. Honestly, it’s a little addictive—there’s something thrilling about flicking through builds like a kid in a toy store, knowing everything’s ready to stream without fuss.
How to Install Fildo on FireStick
What is Doomzday NOVA TV Kodi Build
For this walkthrough, the NOVA TV build from the Doomzday menu was the pick — not because it’s the only good one, but because it strikes a nice balance between flashy and functional. The layout is clean and surprisingly easy to move around, whether using a Fire TV remote, tapping on a tablet, or clicking around on a laptop.
The home screen feels organized without being overwhelming, which, let’s be honest, is rare in the Kodi universe. Categories like Free Stuff, Debrid/4K, For Her, Movies, TV Shows, Family, Allstar, Live TV, and two separate Sports sections line the main menu, each with its own submenu waiting just a click down.
Hover over a category and featured titles pop up above the menu — a small touch, but it makes browsing feel less like digging and more like discovering. Head into Add-ons > Videos and you’ll find familiar names like Seren, SportsDevil, The Magic Dragon, and DeathStar already built in. Overall, it runs smoothly across devices, feels thoughtfully arranged, and doesn’t try too hard — which, in the Kodi world, is kind of refreshing.
How to Setup Doomzday Builds on Kodi
Installing Doomzday Kodi builds may take around 4-5 minutes. To make the process easier to follow, it’s divided into three main parts:
- Part 1: Enabling Unknown Sources
- Part 2: Installing the Doomzday Wizard
- Part 3: Installing Doomzday Kodi Builds
Let’s go through each part step-by-step.
Enable Unknown Sources
By default, Kodi disables Unknown Sources as a security measure to prevent malicious plugins from being installed. However, this also blocks safe third-party builds like Doomzday. You can enable it by following these steps:
- Open Kodi Settings by clicking the gear icon in the upper-left corner.
- Select System.
- Click Add-ons from the left sidebar menu.
- Toggle Unknown Sources to ON.
- When the warning prompt appears, click Yes to confirm.
Downloading the Doomzday Wizard
The Doomzday Wizard is a tool that hosts the build menu, which is necessary to install Doomzday builds. Here’s how to install it:
- Go back to the Settings by clicking the gear icon.
- Select File Manager.
- Click Add source.
- In the window that appears, click on <None>.
- Enter the following URL exactly:
- Name the media source — use doomzday (this usually fills automatically). Click OK.
- Press the back button or return to the home screen, then go to Settings > Add-ons.
- Select Install from zip file.
- Click Yes when warned.
- Choose the source you just added — doomzday.
- Select the Doomzday repository zip file (e.g.,
repository.doomzday-x.x.x.zip). - Wait for the Add-on installed notification.
- Choose Install from repository.
- Select Doomzday Repo.
- Click Program add-ons.
- Open Doomzday Wizard. If on Kodi 20, you can pick either Doomzday GUI Wizard or Doomzday Simple Wizard.
- Click Install.
- Wait for the Doomzday GUI Wizard Add-on installed notification.
- When prompted next, click Dismiss.
How To Install Doomzday Kodi Builds
- From Kodi’s home screen, go to Add-ons > Program add-ons, then open Doomzday Build Wizard.
- Click Builds.
- You’ll see a list of available builds. For this guide, I’m choosing BigKev-Nova. If it’s unavailable, pick any other build you prefer.
- Select Fresh Install.
- Confirm by clicking Yes, Install.
- The build will download and install, usually taking 2-3 minutes.
- I recommend using Fresh Install, which clears Kodi before installing the new build. You can select No Thanks if you prefer otherwise.
- Once installation completes, click OK to force-close Kodi. Restart Kodi to start using the new build.
How to Stream on FireStick with a VPN
Before you start streaming In Firestick, I would like to warn you that everything you stream on firestick is visible to your ISP and Government. This means, streaming copyrighted content (free movies, TV shows, live TV, and Sports) might get you into legal trouble.
Thankfully, there is a foolproof way to keep all your streaming activities hidden from your ISP and the Government. All you need is a good VPN for FireStick Streaming. A VPN will mask your original IP which is detecting… and will help you bypass Online Surveillance, ISP throttling, and content geo-restrictions.
I personally use and recommend ExpressVPN, which is the fastest and most secure VPN. It is compatible with all kinds of streaming apps and devices.
NOTE: We do not encourage the violation of copyright laws. But, what if you end up streaming content from an illegitimate source unintentionally? It is not always easy to tell the difference between a legit and illegal source.
So, before you start streaming on FireStick, here's how to get VPN protection in 3 simple steps.
-
Step 1 Get the ExpressVPN subscription
Get it HERE. It comes with a 30-day money-back guarantee. Meaning, you can use it free for the first 30-days and if you are not satisfied, you can ask for a full refund.
-
Step 2 Download and install the ExpressVPN app
Click HERE to download and install the app on your streaming device. If you are using a FireStick, I have given the exact steps starting with Step 4 below.
-
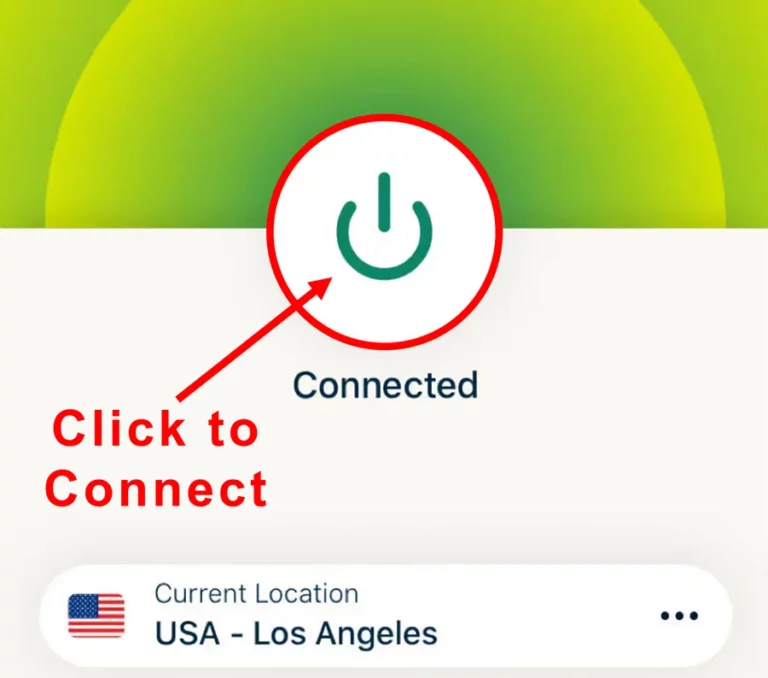
Step 3 Click the Power icon to connect
Your connection is now secure with the fastest and best VPN for FireStick.
The following are the steps to install ExpressVPN VPN on your Fire TV devices. If you have other streaming devices, follow Step 1-3 above.
-
Step 4 Subscribe to ExpressVPN
Subscribe HERE (if not subscribed already).
-
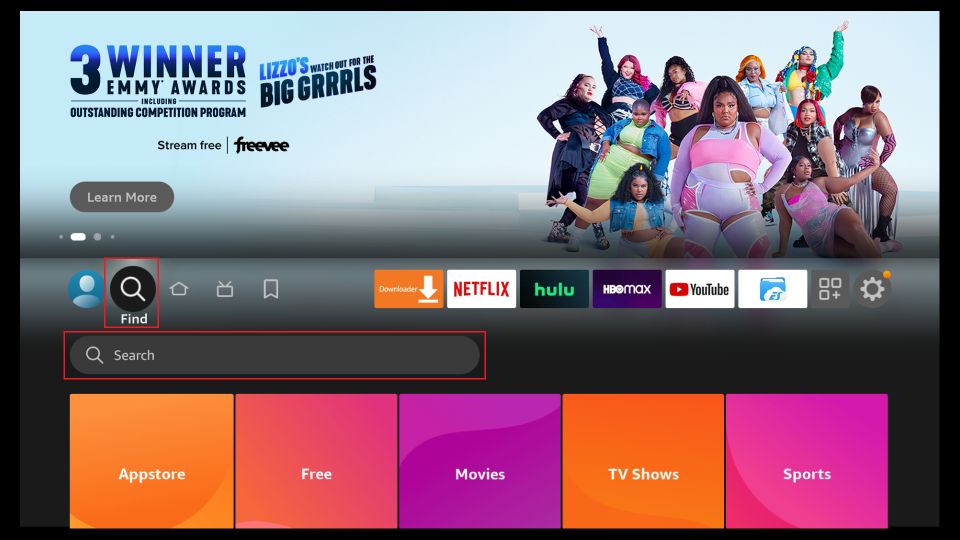
Step 5 Go to Fire TV Stick home screen.
Click Find followed by Search option (see image below).
-
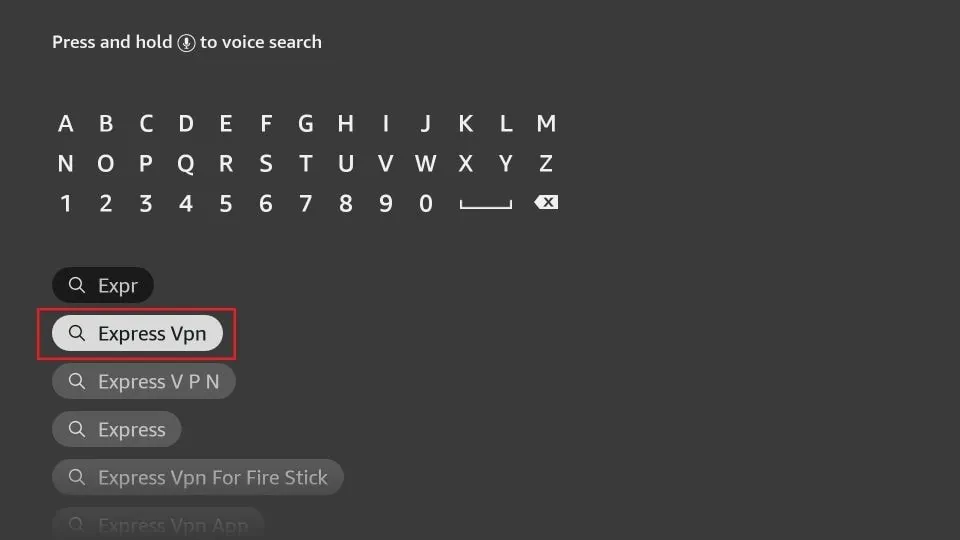
Step 6 Type Expressvpn in the search bar and select when it shows up
-
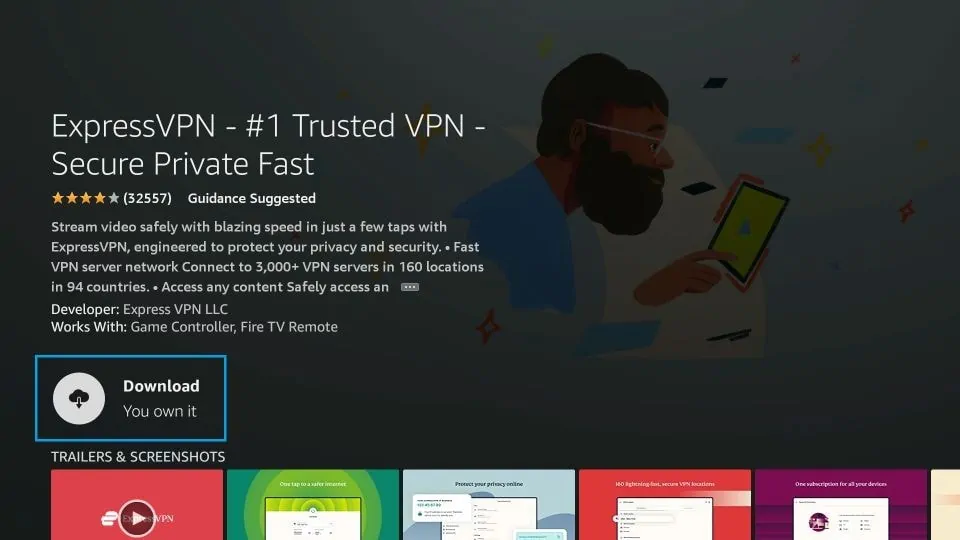
Step 7 Click Download
-
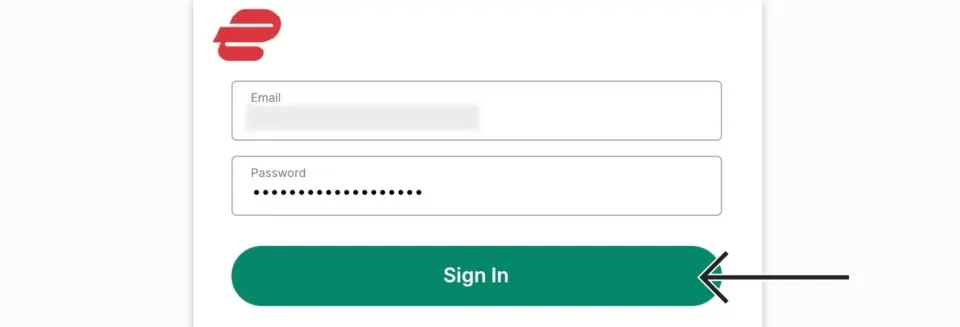
Step 8 Open the ExpressVPN app
Sign in using the email ID and password that you created while buying the ExpressVPN subscription.
-
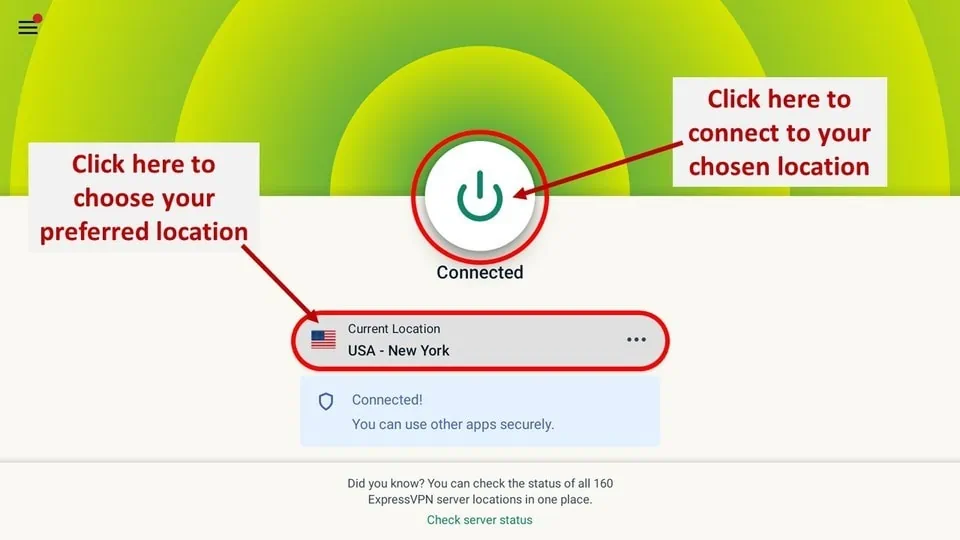
Step 9 Click the Power icon to connect to a VPN server.
That’s all. Your FireStick is now secured with the fastest VPN.
Doomzday Wizard Features 2026
Once installed, Doomzday builds settle in surprisingly well on almost any Kodi device, which honestly feels like a small miracle considering how picky some setups can be. Many users notice the performance is smooth, menus snap into place without drama, and the layout actually makes sense instead of looking like a spaceship dashboard designed at 3 a.m.
The categories are neatly arranged and cover just about everything expected — movies, shows, live TV, sports, kids content, and more — all lined up in a way that feels intentional rather than cluttered. It’s the kind of build that doesn’t try too hard to impress, yet still manages to look polished and practical.
Doomzday Wizard Categories
- Movies:
- TV Shows:
- Live TV:
- Live TV Category
- Sports:
- Sports Category
- Cool Stuff:
- Cool Stuff Category
- Wizard:
There’s a certain nerdy satisfaction in scrolling through it, realizing someone clearly obsessed over the details so others wouldn’t have to. Not perfect, not flashy for the sake of it, just thoughtfully packed and ready to run — which, in the chaotic world of Kodi builds, is saying quite a lot.
Doomzday Kodi Builds Alternatives For Streaming
|
Build Name |
Primary Focus |
Size / Speed |
Debrid Required? |
Key Add-ons Included |
|
Diggz Xenon |
All-in-One (Movies/TV/Sports) |
Medium (Fast) |
Optional (Recommended) |
Umbrella, Seren, Asgard, The Loop |
|
Green Monster |
Variety & Customization |
Lightweight |
No (Supports RD) |
The Crew, Chains, Rising Tides |
|
Misfit Mods Lite |
Low-RAM Devices (Firestick) |
Very Light |
No |
The Crew, Scrubs V2, Rising Tides |
|
Estuary Switch |
Simplicity & Speed |
Ultra-Light |
No |
The Crew, Homelander |
|
Plutonium |
Visuals & Large Screens |
Medium |
No |
Asgard, Patriot, Shazam |
|
Aspire |
Movies & TV Shows |
Heavy |
Optional |
Ghost, Magic Dragon, Diggz Free99 |
Final Thoughts For Install Doomzday Kodi Builds
Doomzday honestly feels like that overstuffed toolbox that somehow has exactly what you need. The builds come loaded with a bunch of popular addons — many of them the same heavy-hitters people rave about on “best of” lists — covering everything from movies and binge-worthy shows to kids content, sports, and live TV. Most of them are surprisingly lightweight too, which is a relief if the setup runs on something modest like a FireStick that wheezes under pressure. Sure, a couple of builds can get a little chunky and may lag if pushed too hard (nothing’s perfect), but overall the collection feels thoughtfully put together. It’s not flashy for the sake of it — just practical, flexible, and genuinely fun to explore if there’s an itch to experiment with different Kodi builds.